
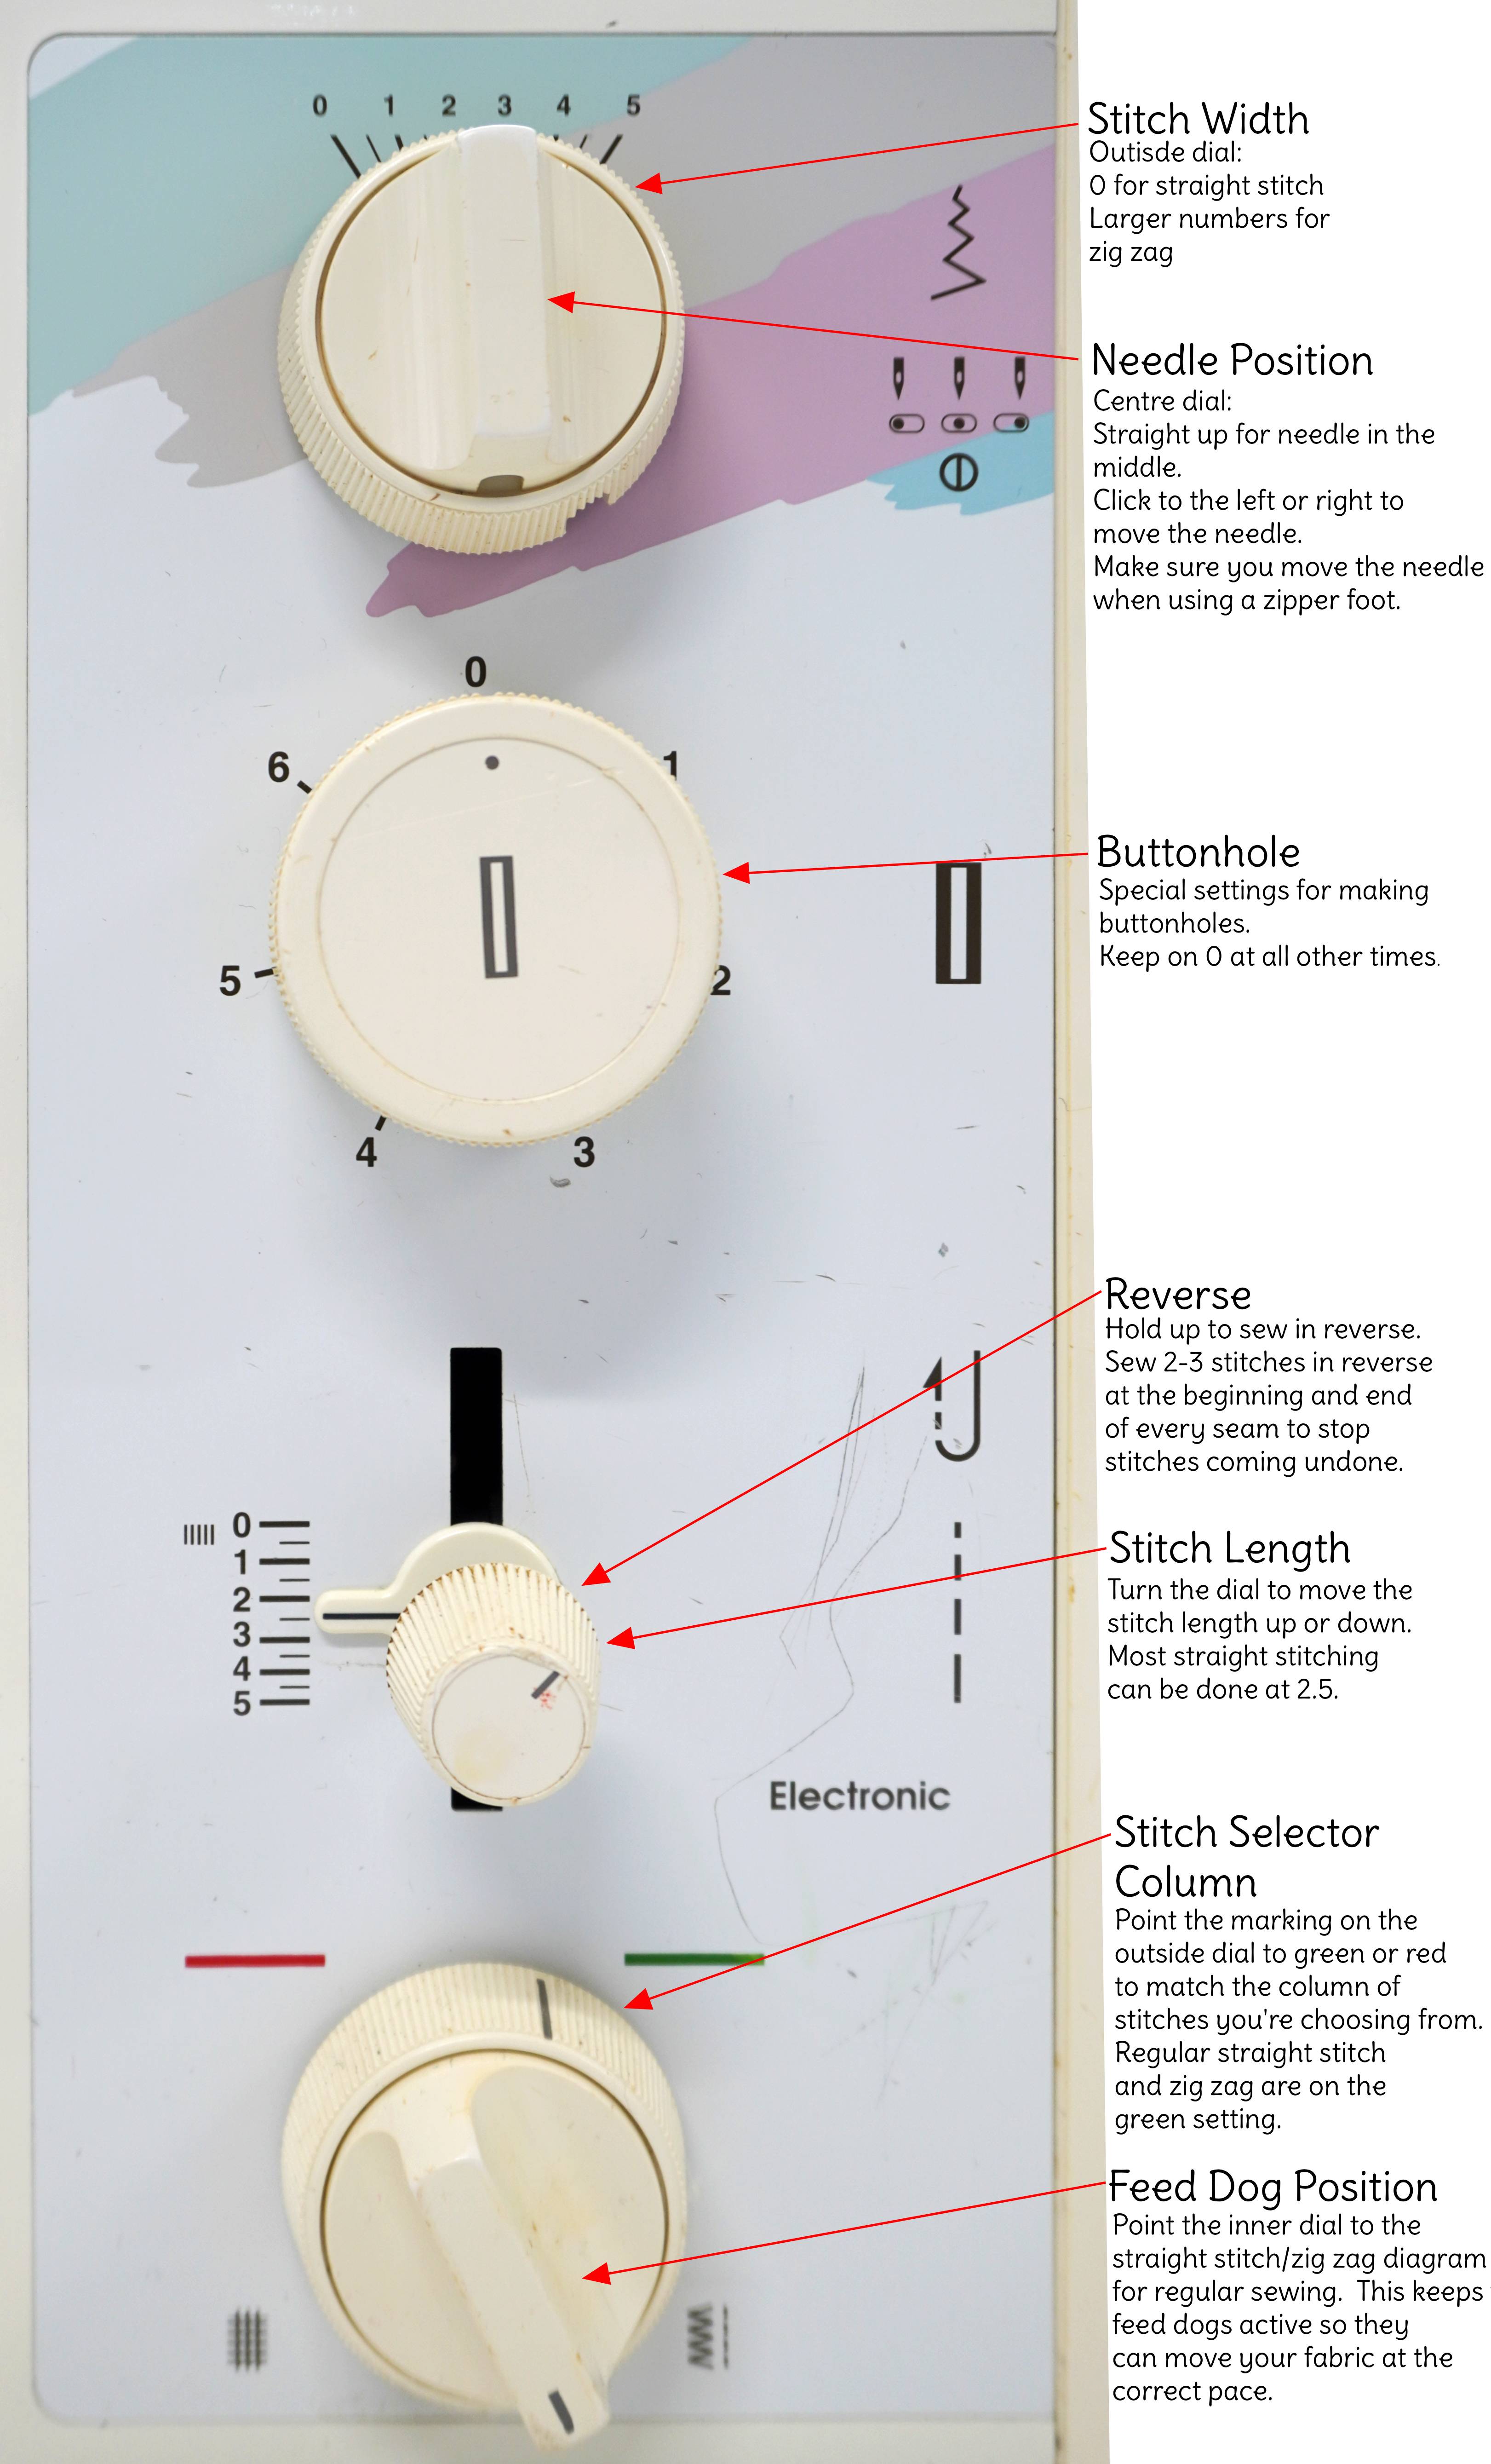
The Control Panel
Overview of all dials. Refer to this diagram to locate the Top Tension, Needle Position, Stitch Width, and Stitch Length.
Standard Machine Settings
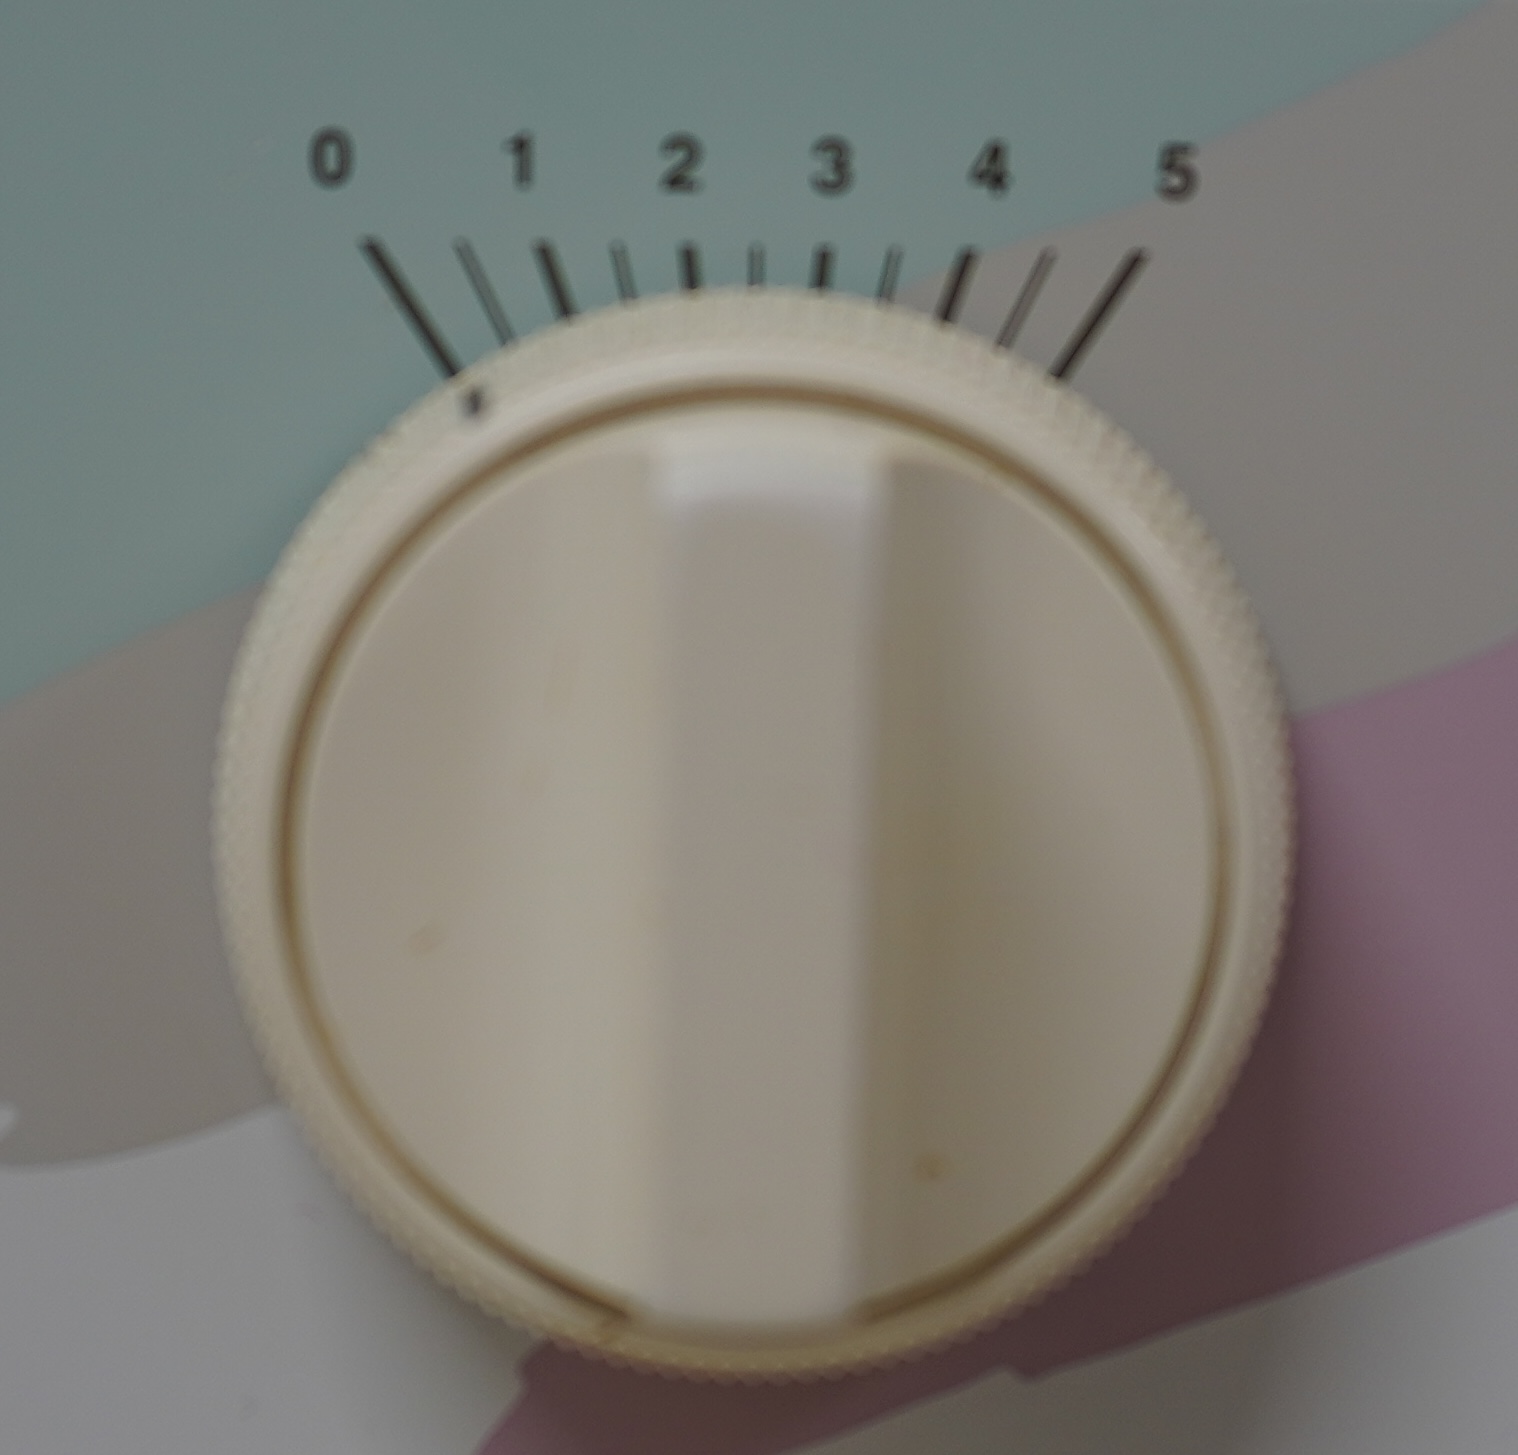
Straight Stitch
Stitch Width: 0
Needle Position: Centre
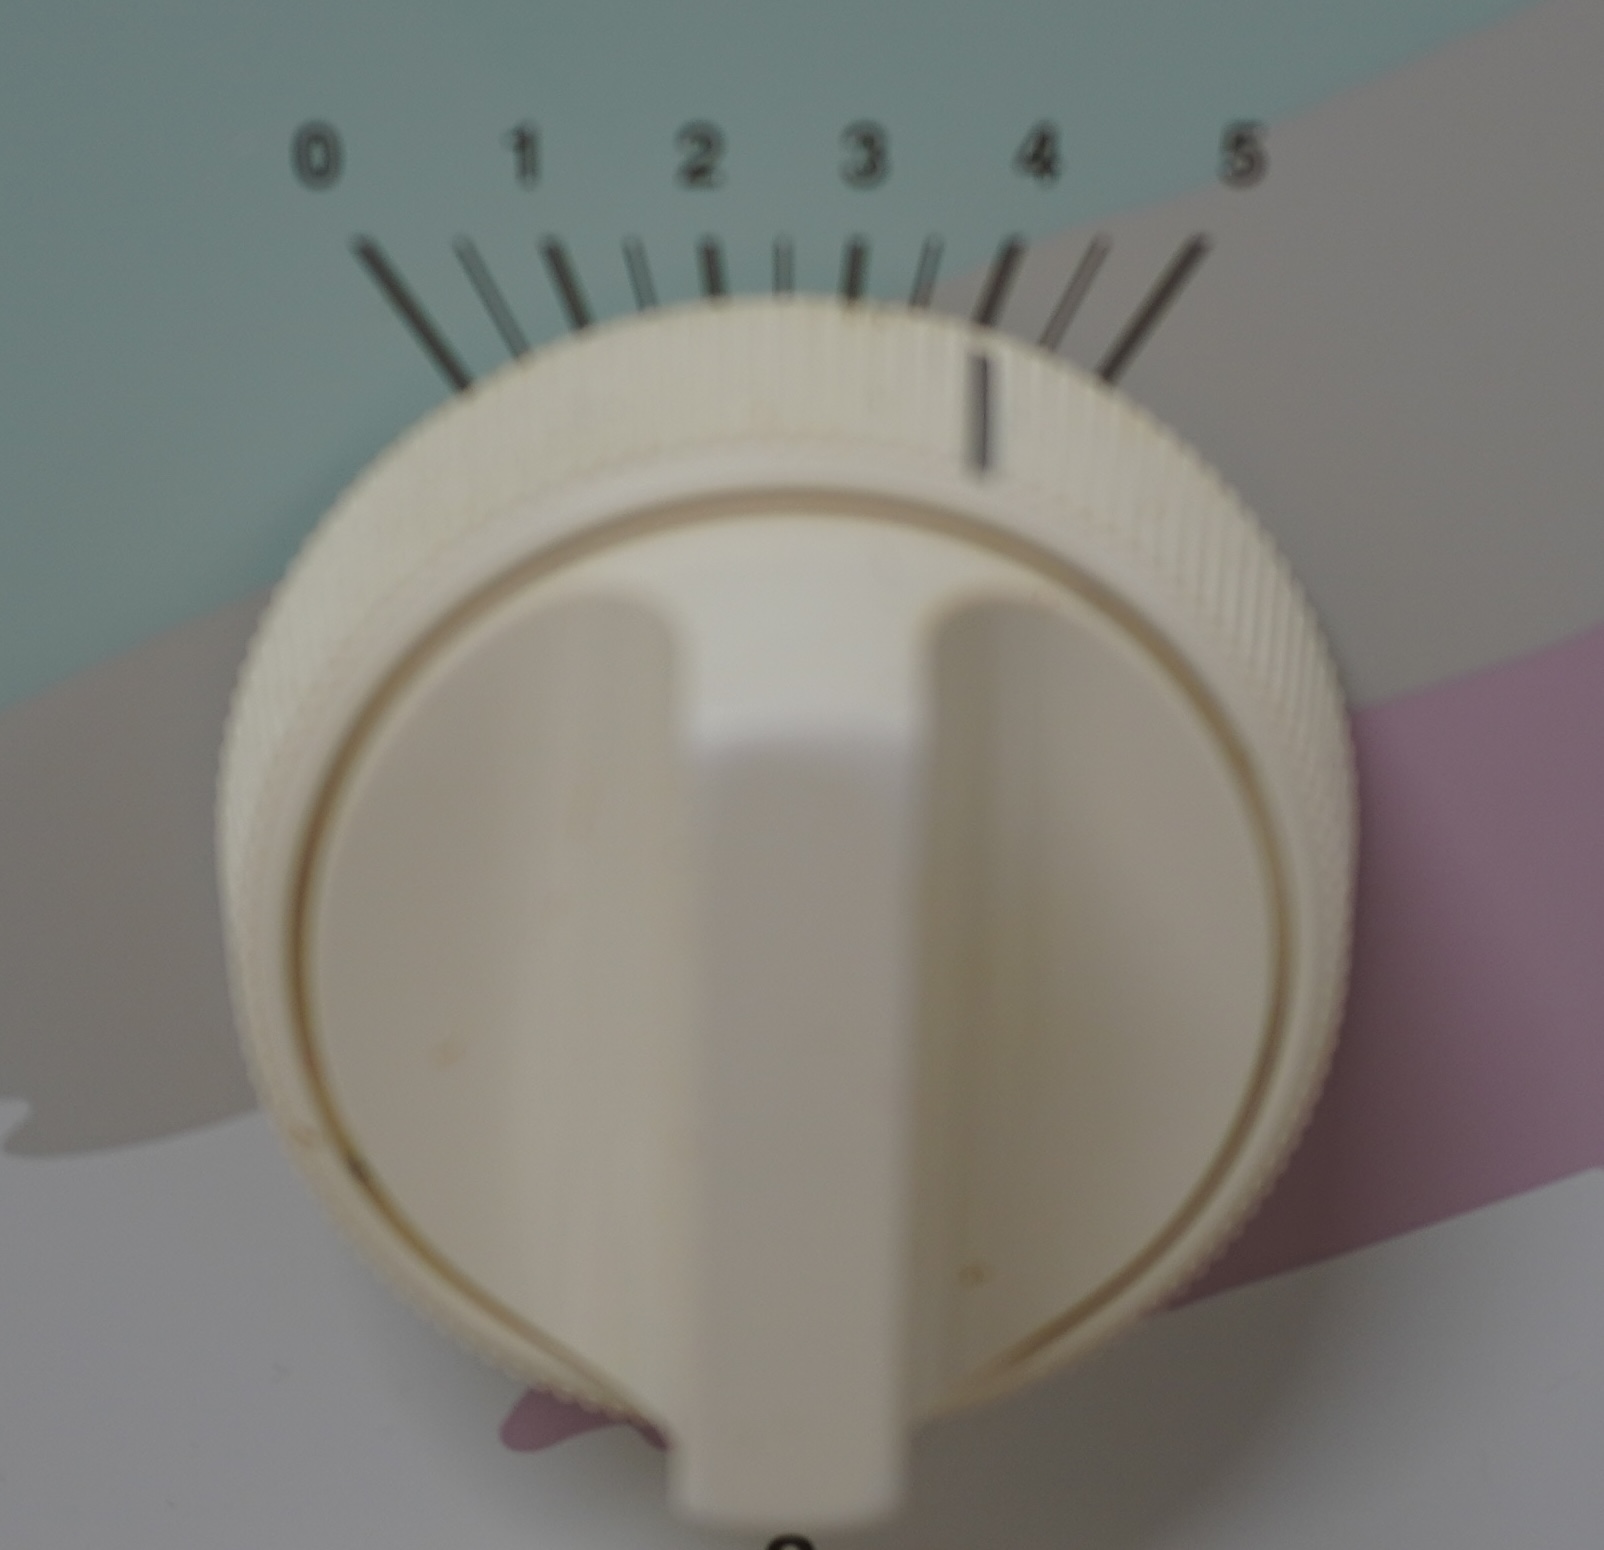
Zig Zag
Stitch Width: 1-4
Needle Position: Centre

Feed Dogs
Keep the side dial UP for normal sewing.
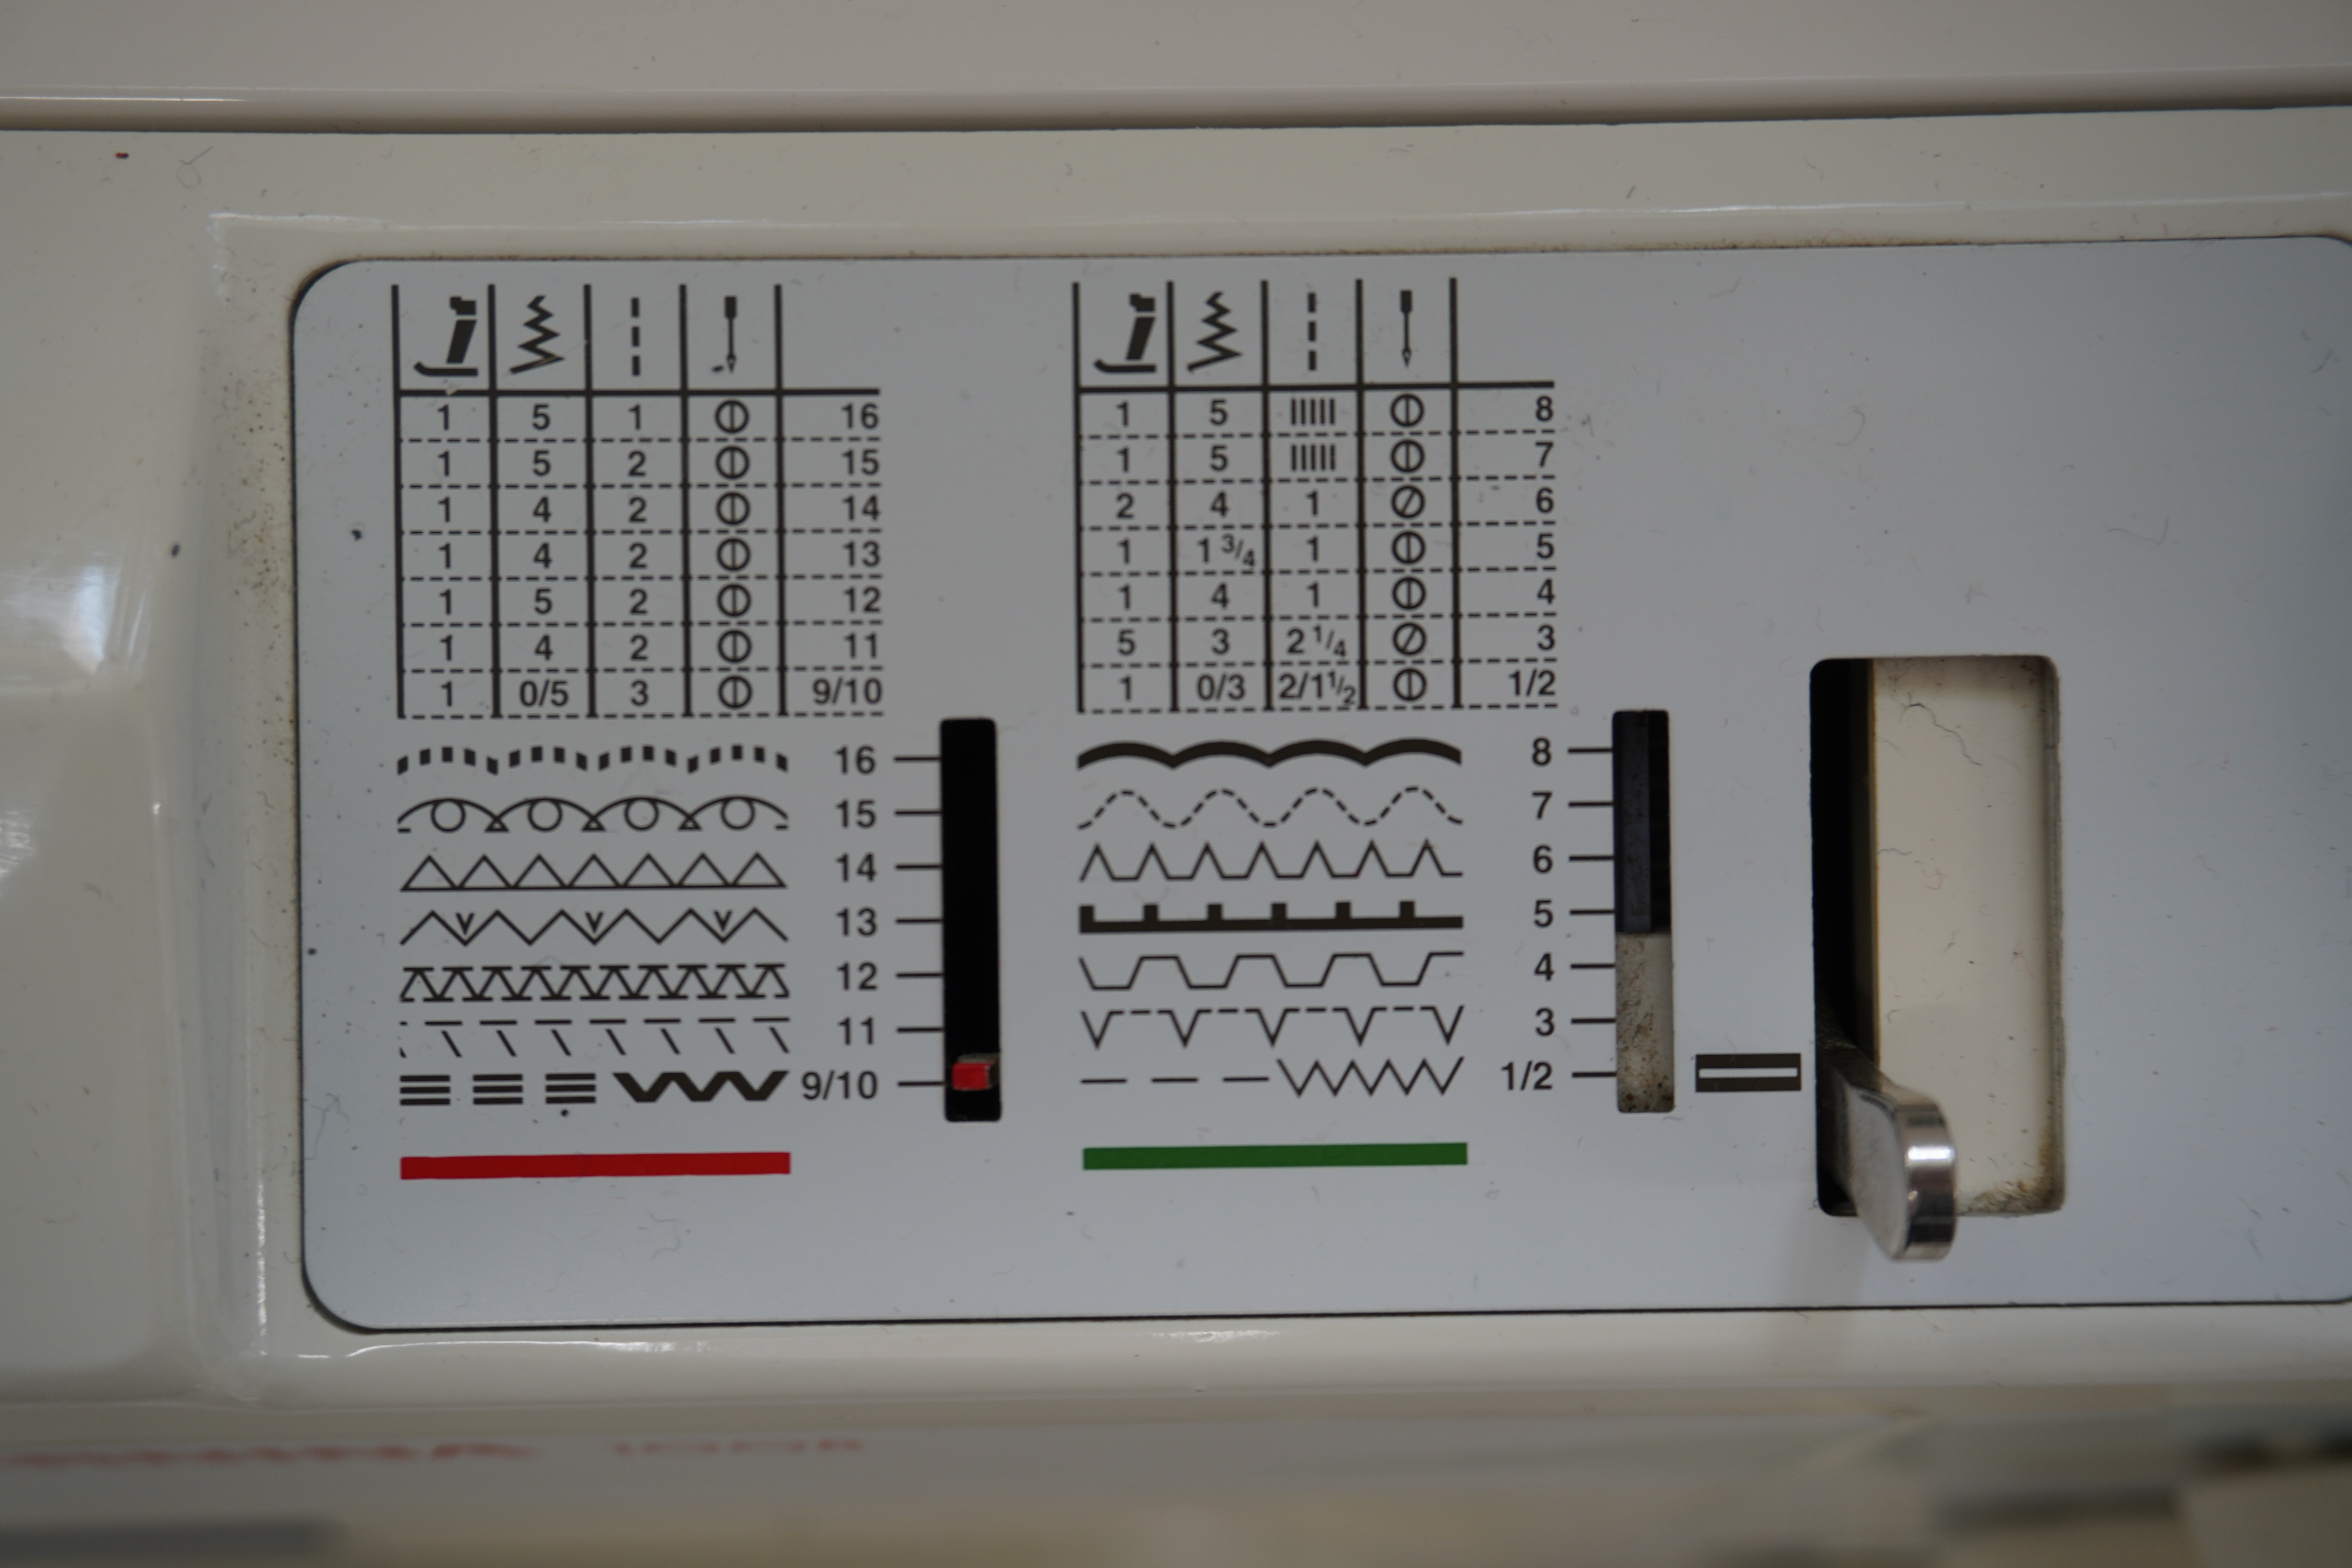
Stitch Selector
Choose the Green '1' for standard straight stitch.
Lining Up Your Fabric
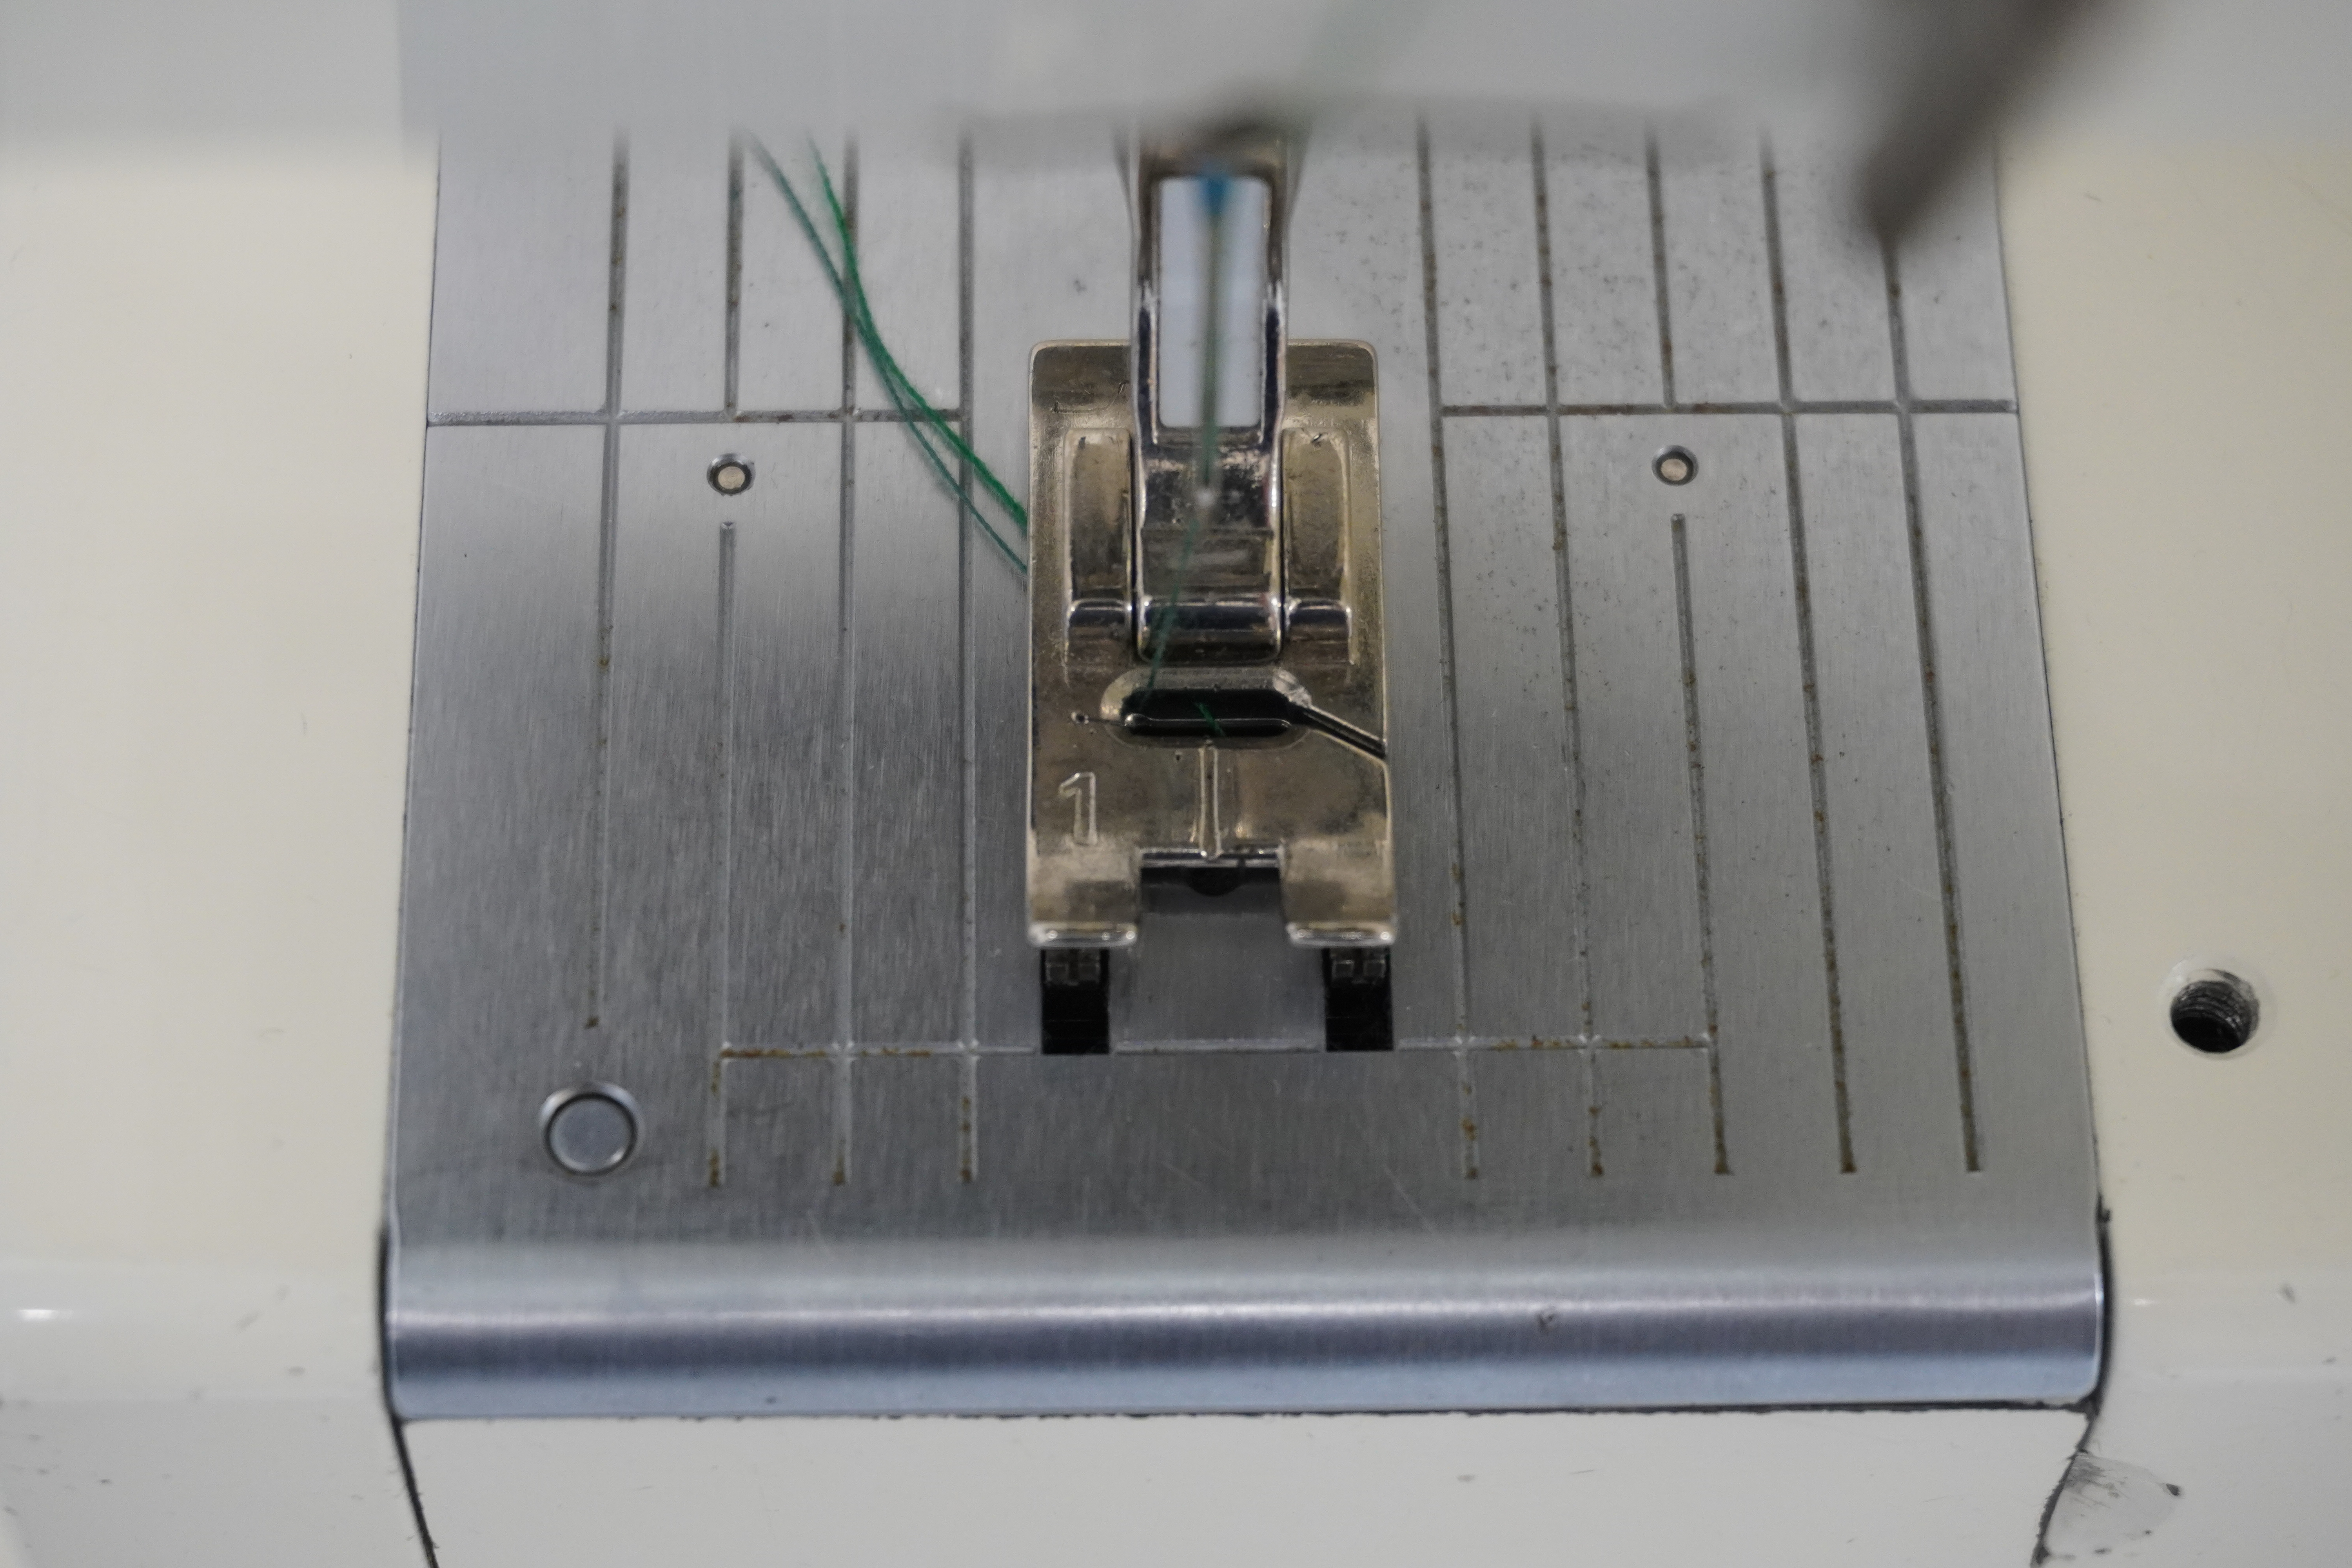
The Throat Plate
Familiarise yourself with the etched lines on the metal plate. These are your guides.
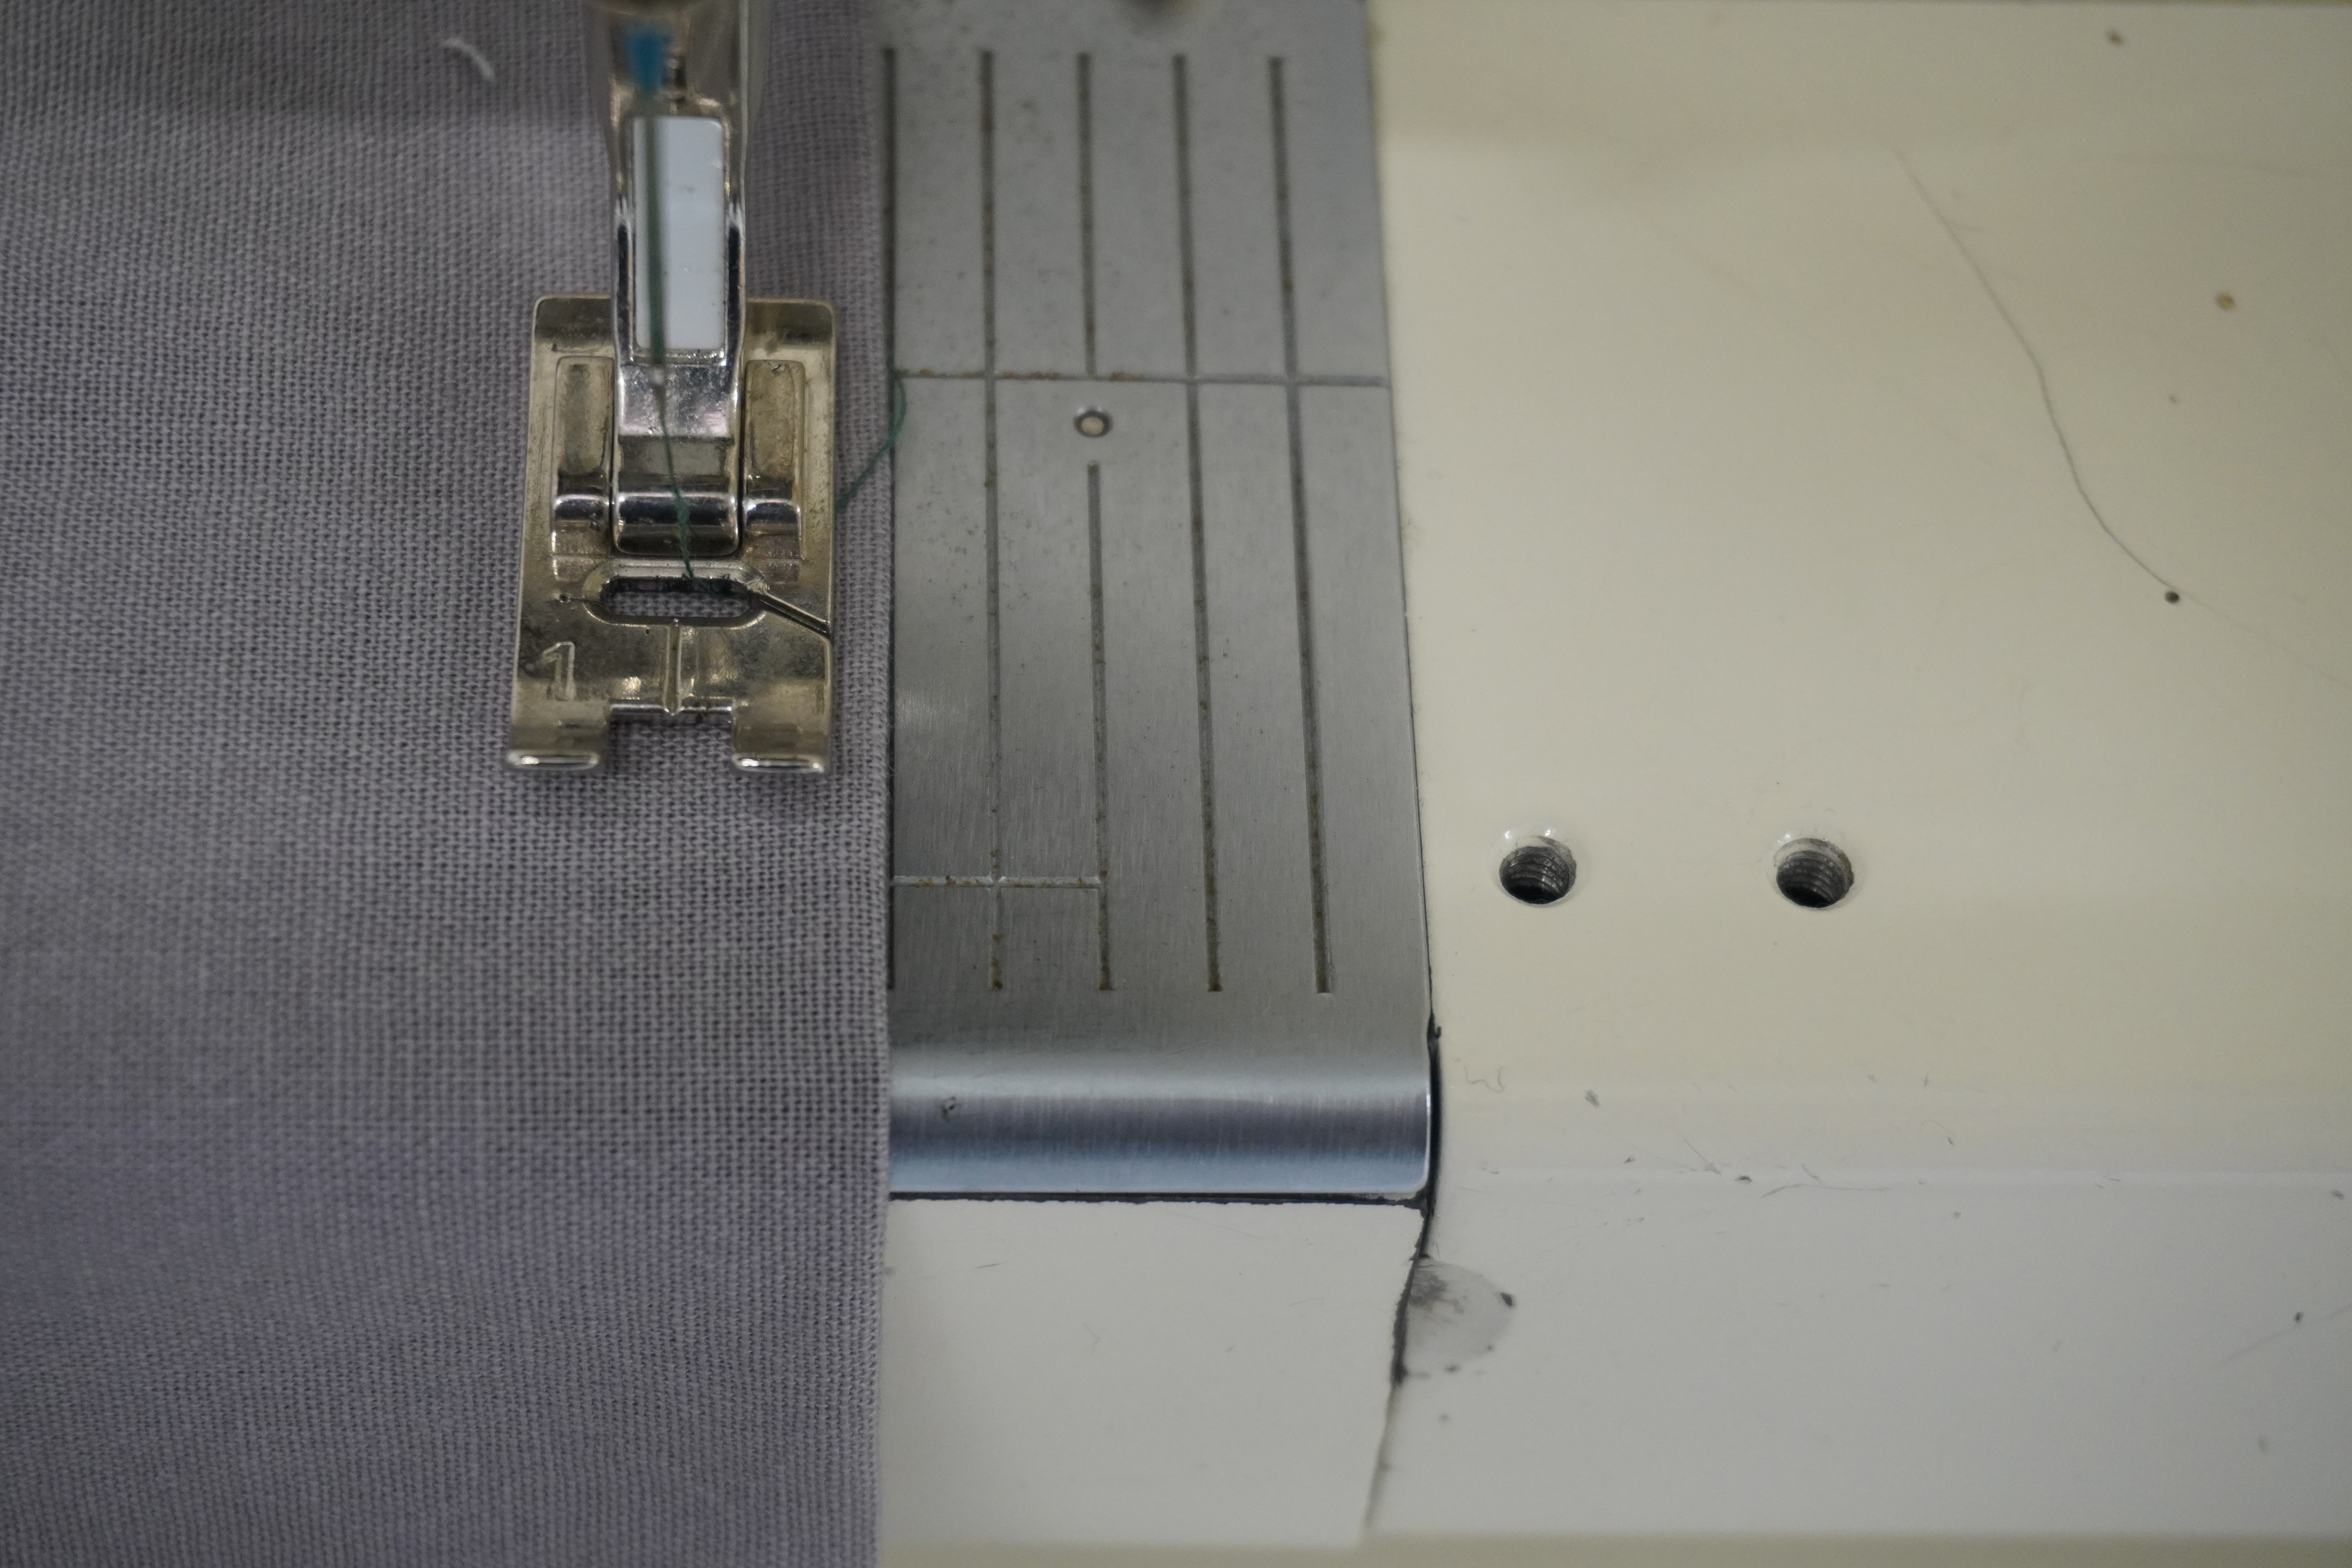
1 cm Seam Allowance
Standard for most patterns. Line your raw edge up with the '10' line (10mm).

1.5 cm Seam Allowance
Often used in clothing. Line up with the '15' mark (between 10 and 20).
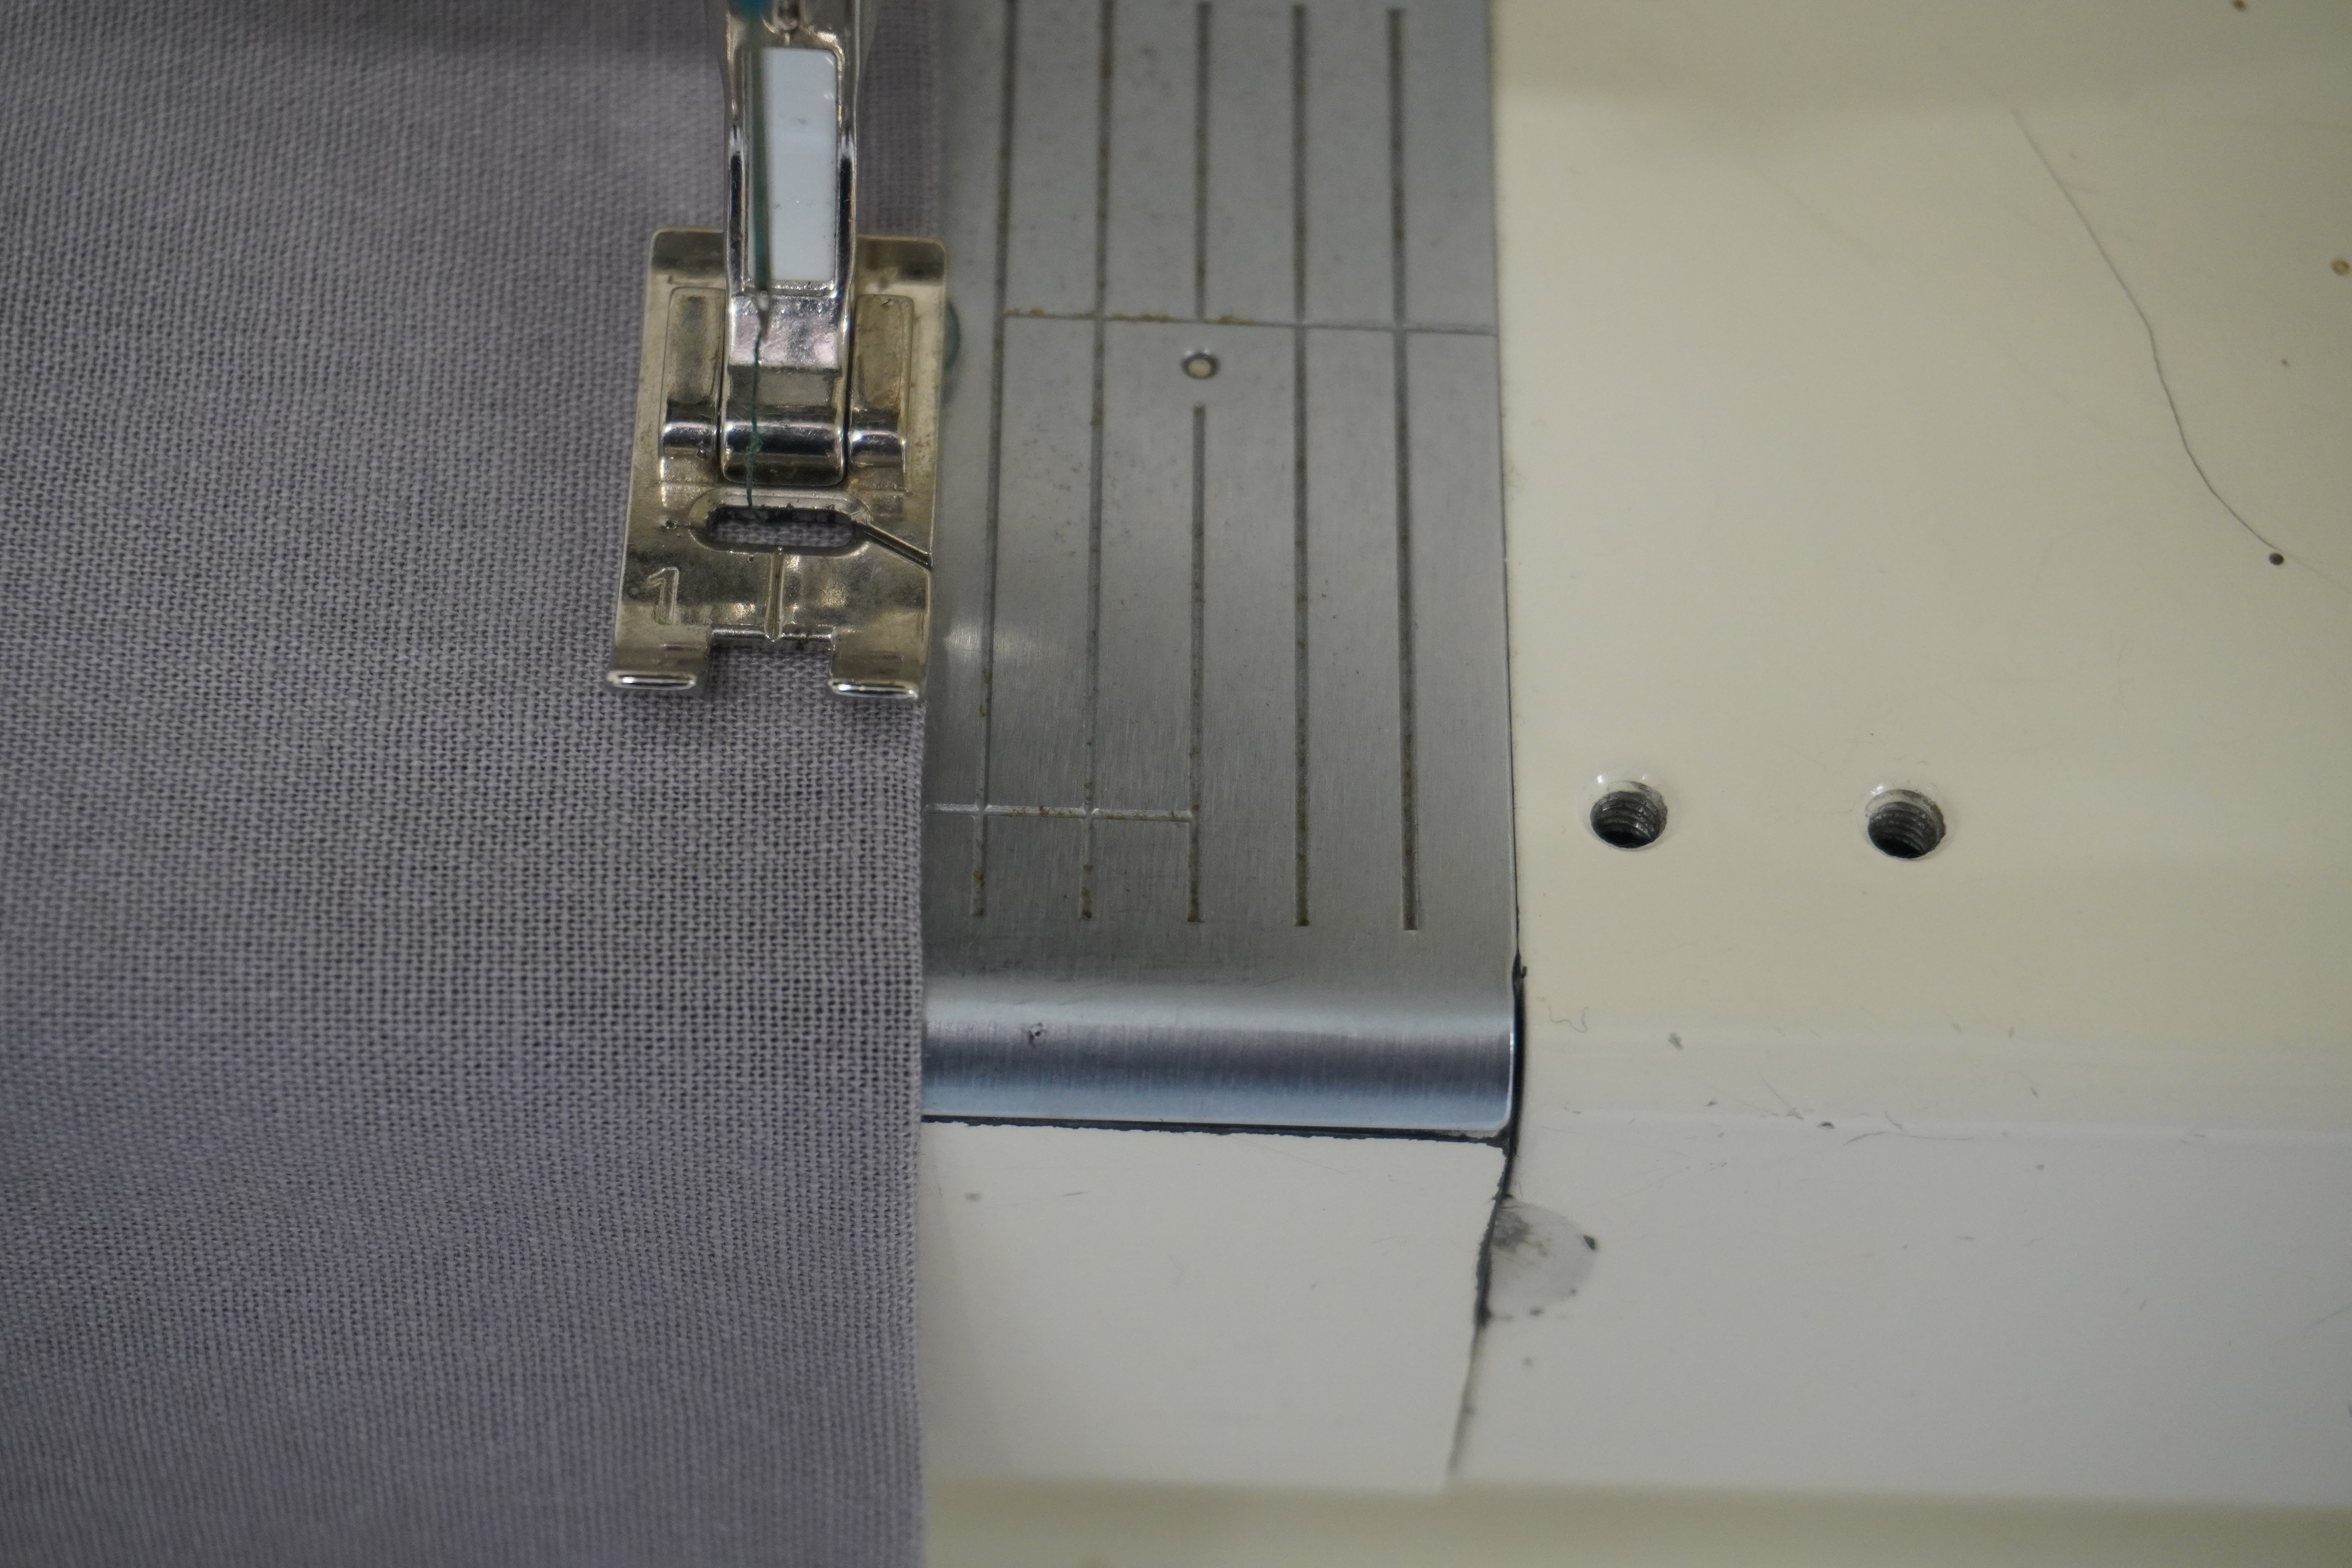
Small Seam (3/4 cm)
Using the side of the presser foot as your guide gives you roughly a 0.75cm seam.
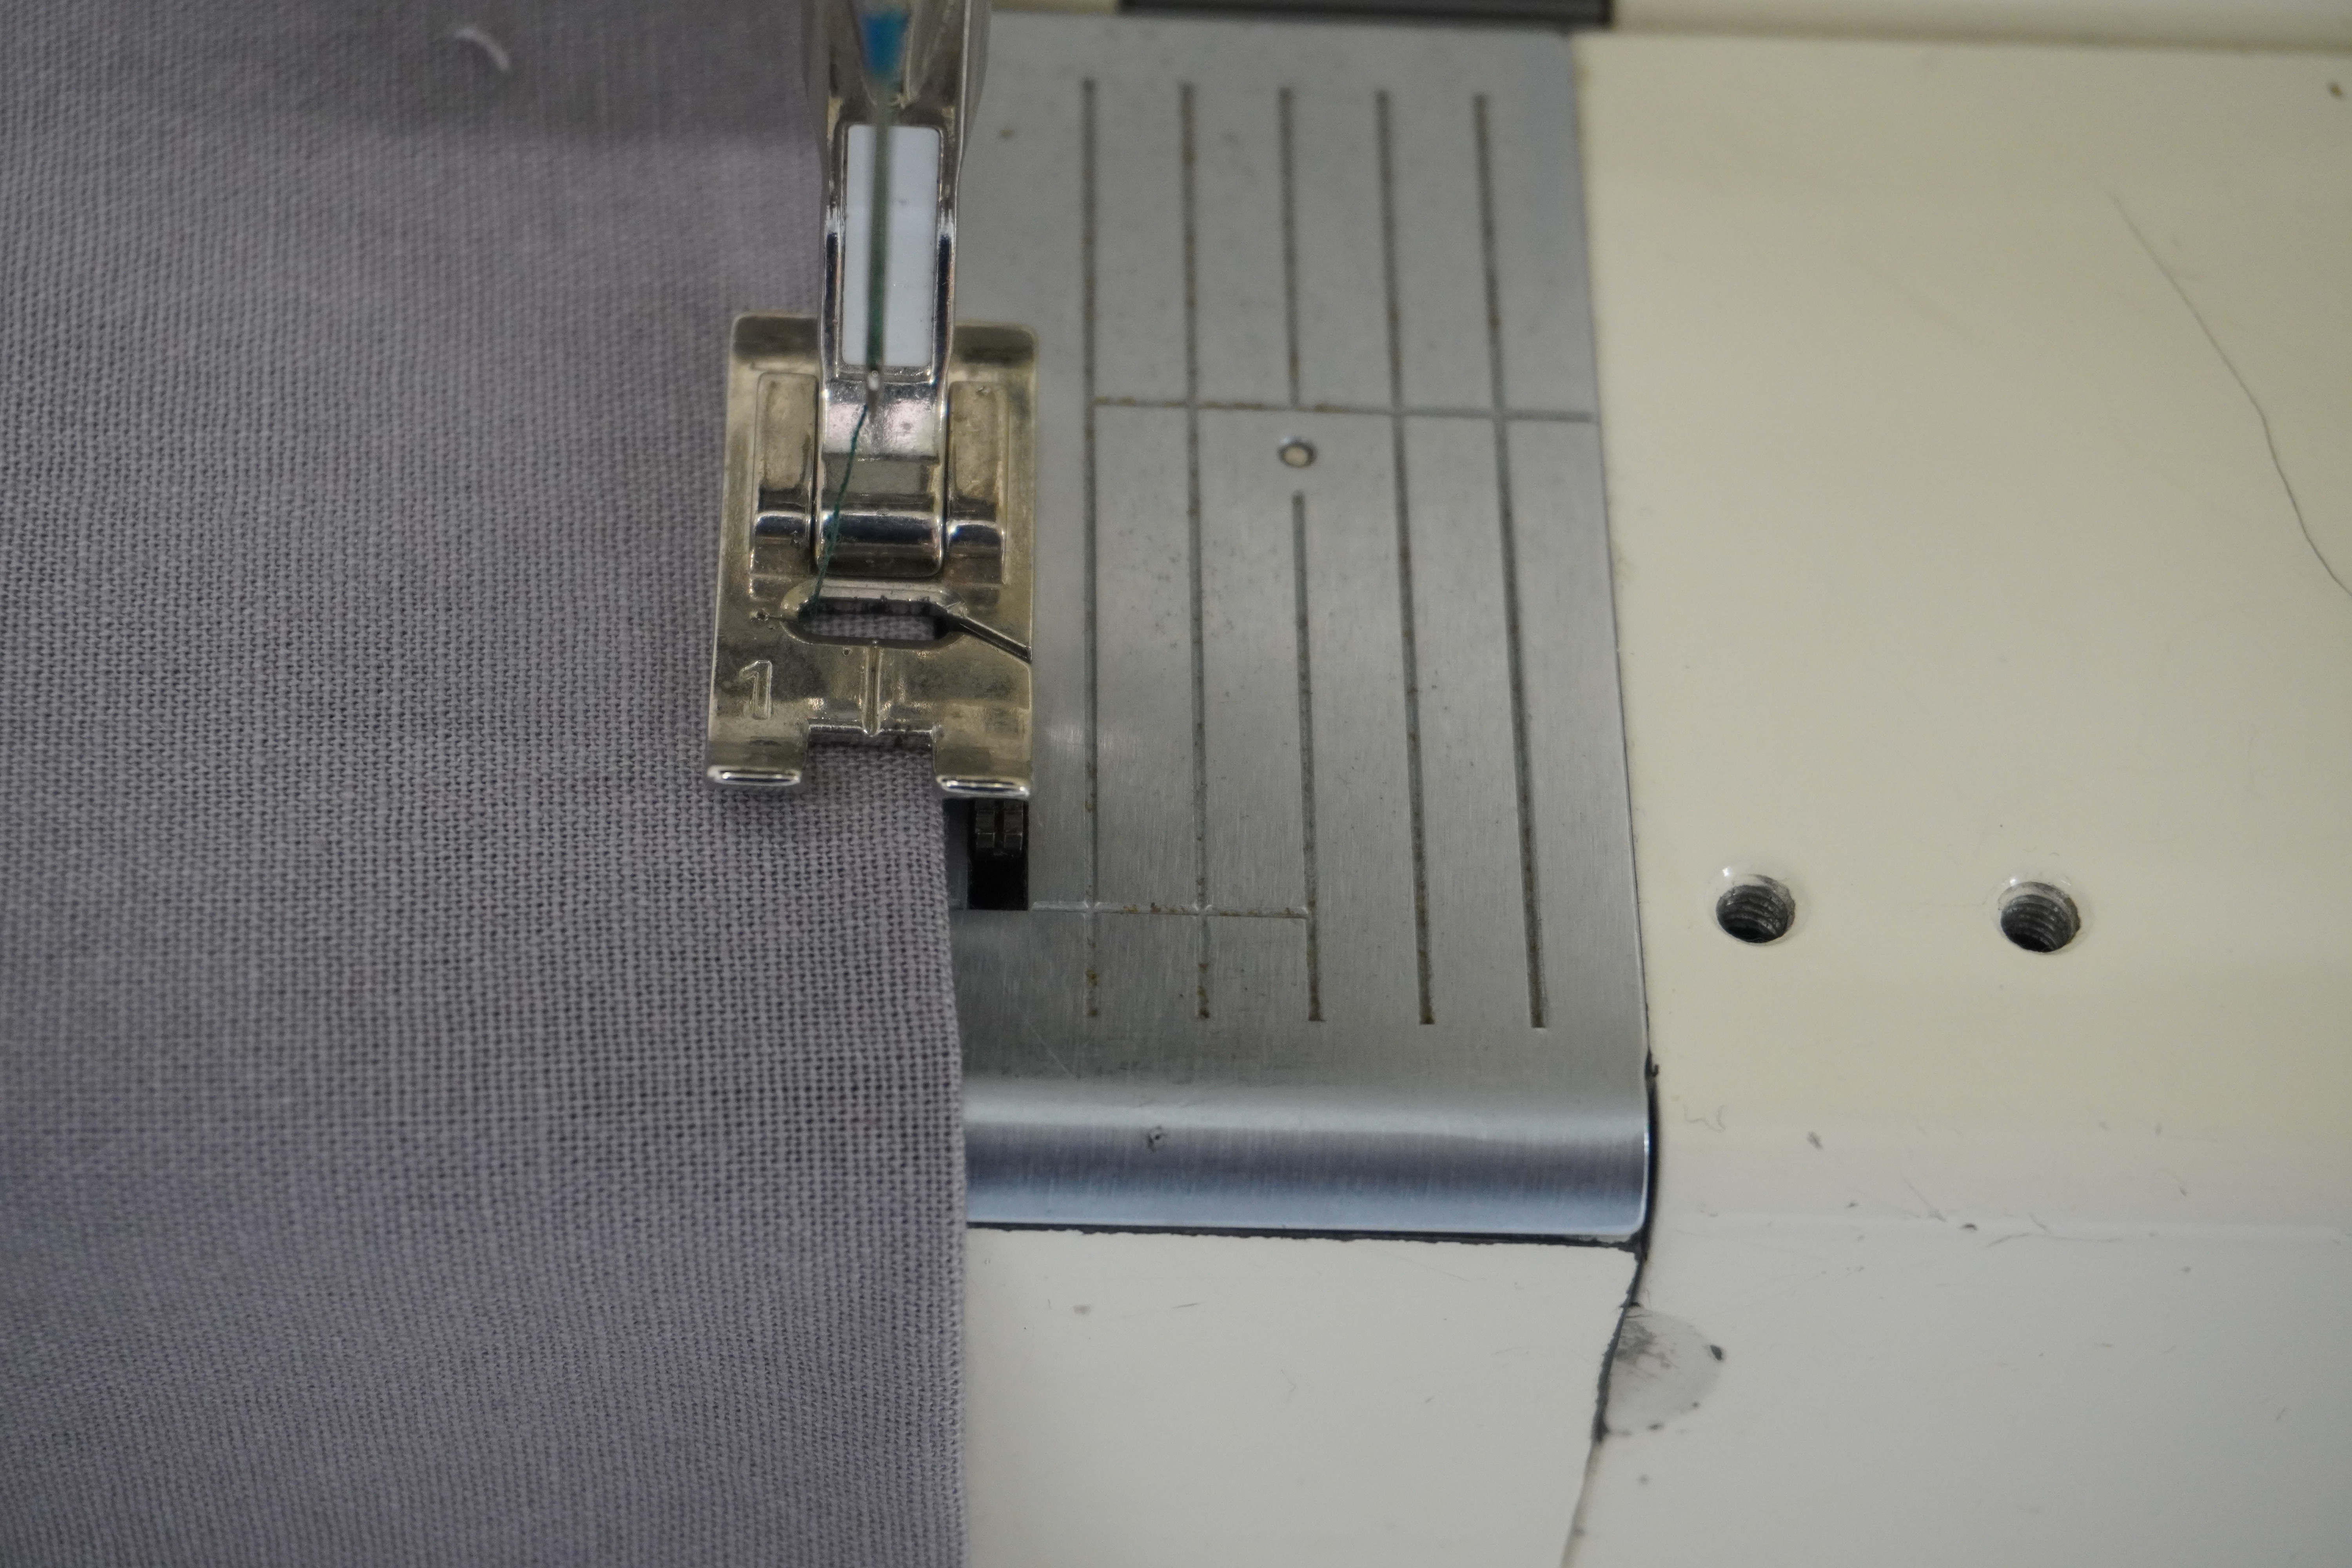
Edge Stitching
Sewing close to the edge. Keep the fabric edge just inside the right toe of the foot.
💡 Tip: The Tape Trick
Use masking tape to mark a custom guide line. (Remove it when finished so it doesn't leave sticky residue!)
Changing Feet & Zippers
Zipper Safety Checklist
When sewing a zipper, using a zipper foot will allow you to sew closer to the zipper teeth.
Using the Zipper Foot:
- Change the regular foot to a Zipper Foot.
- Move the needle position to the Far Left or Far Right.
- TEST: Turn the handwheel slowly to ensure the needle does not hit the metal foot.
Now you're ready to sew your zipper.
Reminder: Change back to the regular foot (and centre needle) when finished!
How to Change the Foot
Lift the lever at the back of the ankle to drop the foot. Click the new one onto the bar.

The Zipper Foot
This narrow foot allows you to stitch right next to zipper teeth without hitting them.
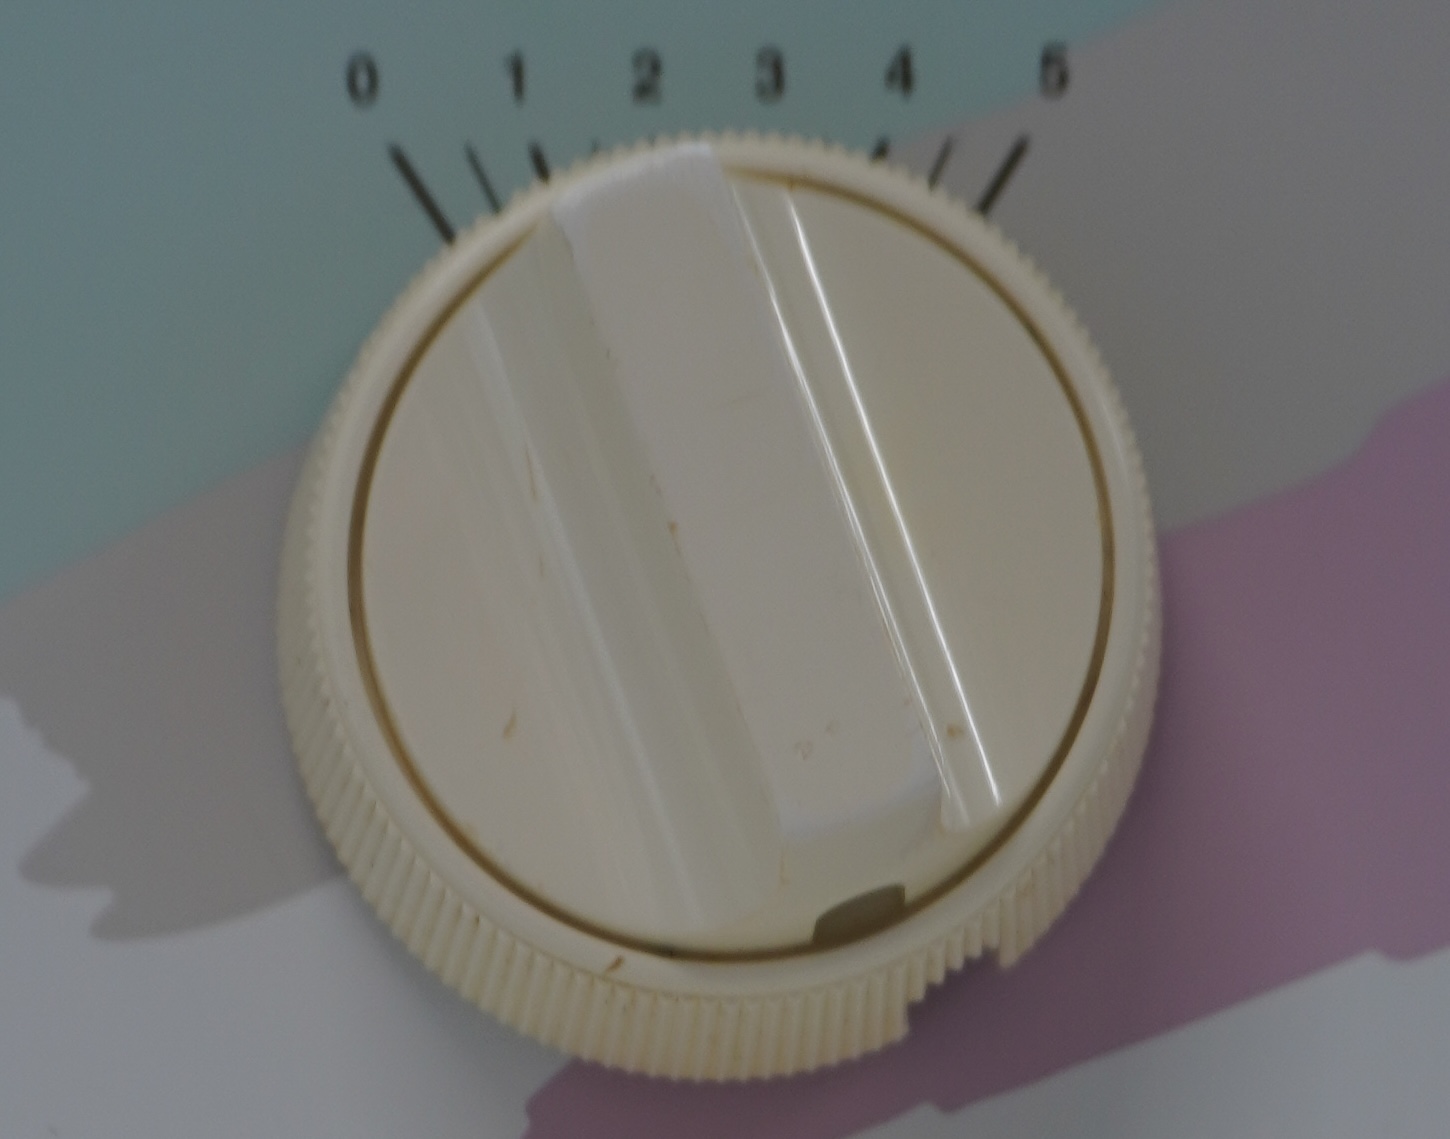
Zipper Setting: Needle Left
If the foot is on the RIGHT of the zipper, move the needle to the FAR LEFT.
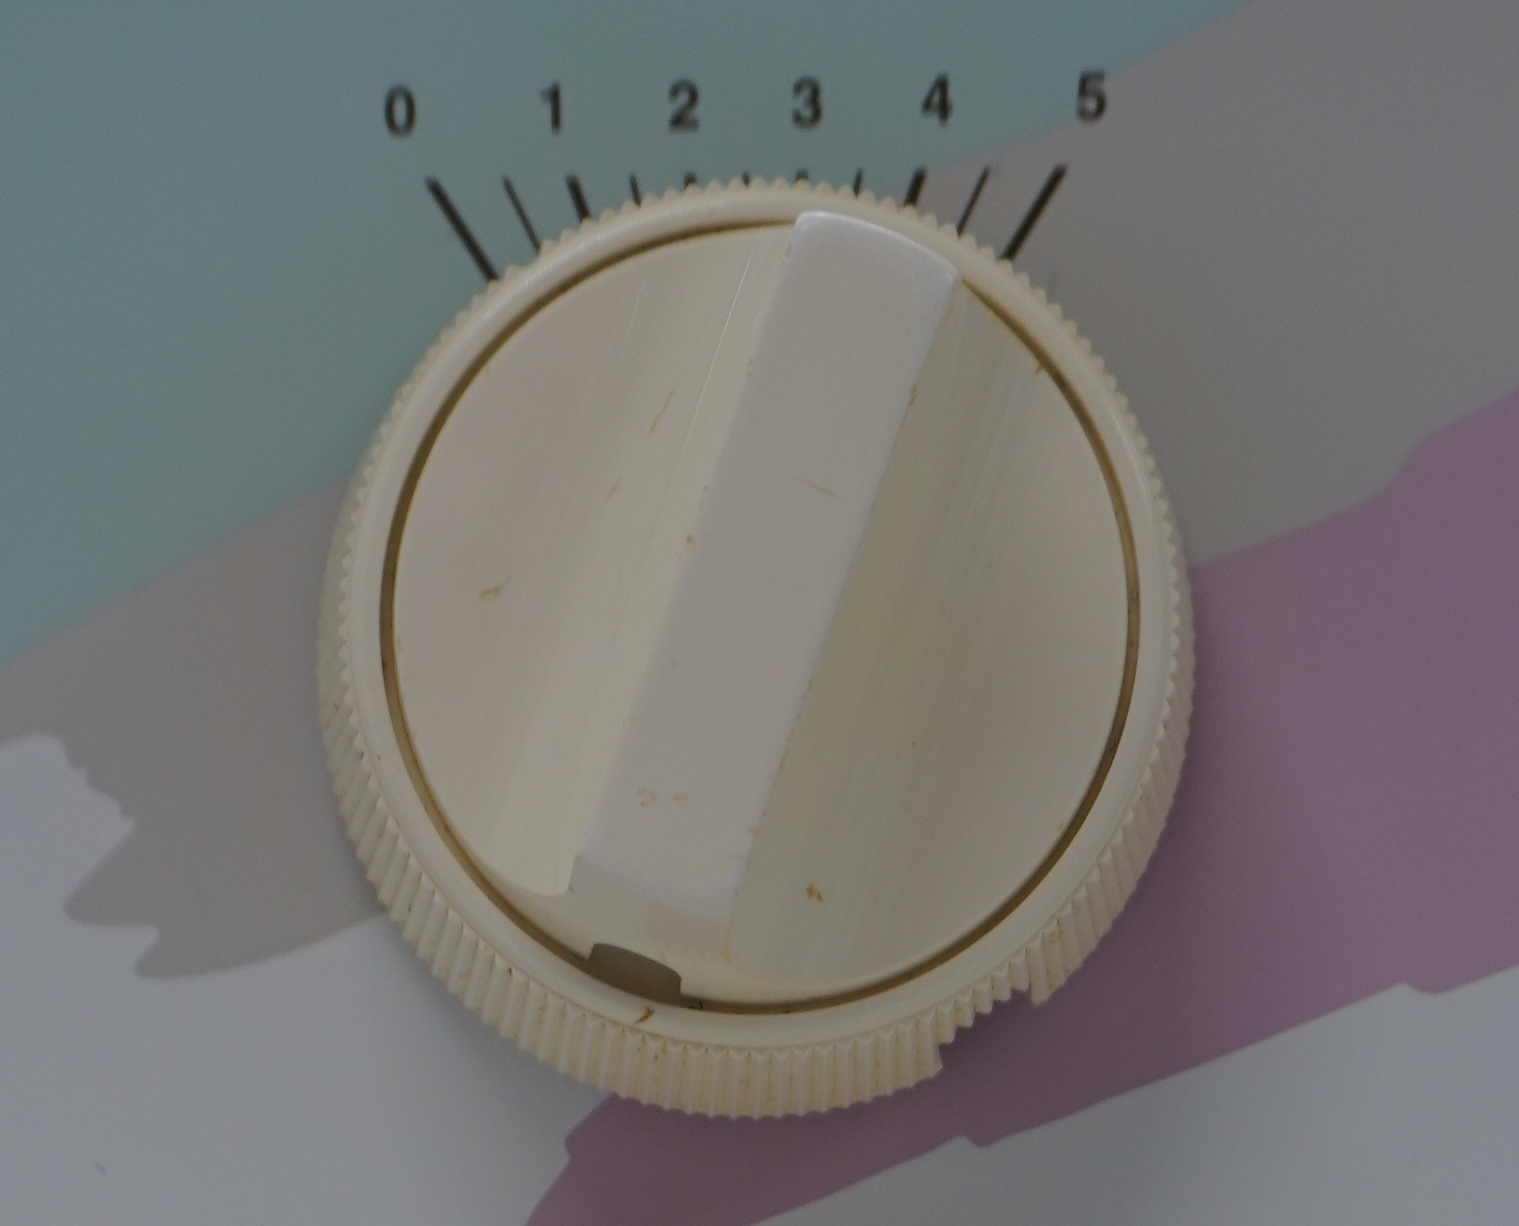
Zipper Setting: Needle Right
If the foot is on the LEFT of the zipper, move the needle to the FAR RIGHT.